
 Stickers Menu Dialog
The Surface is composed of many separate layered graphics, of three different types- Backgrounds, Skins, and Stickers. The Background was described in the Surface page.
Skins are big images that wrap all around the sculpture just like Backgrounds do, but they should have transparent areas to show the rest of the surface through it. This lets you make a design that you can use with many sculptures, but can have unique colors and patterns with each sculpture. The program comes with two example Skins of a Witch and a Snowman.
Stickers are small graphics that you can place on the sculpture. You can move them around, or change their size. They can be set to tile vertically, horizontally, or both. You can have numerous Stickers on the Sculpture, as many as your iPad's memory can handle.
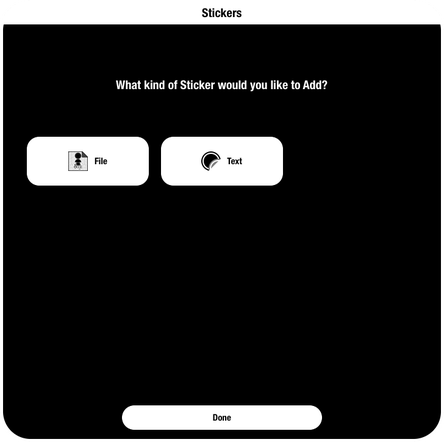
Press and hold the "Stickers" button to bring up the Stickers Menu Dialog. Here you can choose the kind of Sticker you want to add. There are currently two kinds of Stickers- Image Stickers and Text Stickers.
Skins are big images that wrap all around the sculpture just like Backgrounds do, but they should have transparent areas to show the rest of the surface through it. This lets you make a design that you can use with many sculptures, but can have unique colors and patterns with each sculpture. The program comes with two example Skins of a Witch and a Snowman.
Stickers are small graphics that you can place on the sculpture. You can move them around, or change their size. They can be set to tile vertically, horizontally, or both. You can have numerous Stickers on the Sculpture, as many as your iPad's memory can handle.
Press and hold the "Stickers" button to bring up the Stickers Menu Dialog. Here you can choose the kind of Sticker you want to add. There are currently two kinds of Stickers- Image Stickers and Text Stickers.
Image Stickers
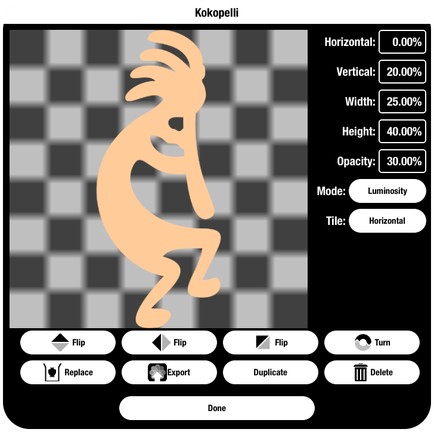 Image Sticker Editor
Image Stickers are loaded from image files.
You create a new image Sticker by loading one of the images that came with the app or one you loaded onto the app from iTunes. You can even pick an image from your Photos to use as an Image Sticker.
Once you have some Stickers loaded, you can touch each one of the thumbnails in the Stickers bar to select it. When a Sticker is selected, you can position them by stroking the screen, or resize them by pinching.
Touch and hold an individual Sticker thumbnail button to bring up a dialog box where you can do additional edits to the Sticker, such as changing it's size, or flipping it around. Size and position are percentages- vertical and horizontal positions of 0% puts it front and center. Vertical of 100% places it at the top lip, half cropped off. -100% puts it at the bottom lip, also cropped. Positioning it horizontally 100% or -100% put it in the back. A horizontal width of 200% makes it wrap all around the sculpture.
Text Stickers
 Text Sticker Editor
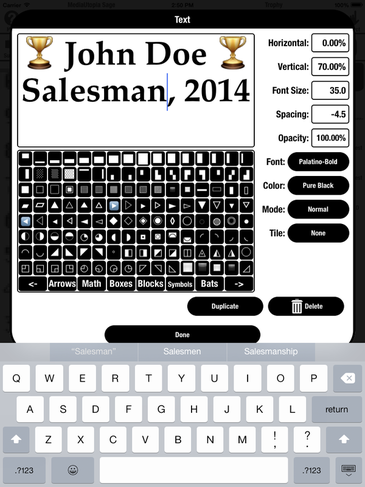
Text Stickers do not get loaded from a file, you just create one from the Stickers Menu Dialog, and then edit it. It starts with the word "Text" written big and blue. You can edit the text, the font, the color, and the size.
You can even use emoji! Warning though- emoji are very low resolution, so they will be blurry if you try and make them too large.
In addition to Regular letters and emoji, you can use Unicode Symbols. the iPad does not have Unicode Symbols available on it's keyboard, so there is a mini keyboard right in the Text Sticker Editor. You can use both the minikeyboard and the iPad keyboard.
Sticker Bar
You can change the layering order of the Stickers by dragging the buttons up or down in the Sticker bar. The Background cannot be moved higher, but it can be duplicated, and it's duplicate can be treated just like any other Image Sticker.
In addition to using the tools in the Surface mode to edit your Surface, you can export the Background, Skins or Image Stickers to your Photos, edit them in any painting or photography program you like, save them back to your Photos, and then reload them.
If you create an image with some other program to import, they can be of any size and any aspect ratio, and it will be stretched to fit. For best results, make a Surface or Skin image that is wider than it is tall, since it will wrap around the sculpture. Remember though, that since you can shape the sculpture very curvy, the image will get distorted.
Once you have made the graphics, you must name them with a two part file extension: like ". sticker.png" or ".skin.png". If you do not, Sage will not recognize them as Stickers or Skins, and will load them as Backgrounds. You can use "File Sharing" in iTunes to transfer the files to the app.
PNG is the preferred image format for decals, and is the only one where transparency will be accepted. Images can be in the following formats as well:
Exported Stickers will always be PNG.
In addition to using the tools in the Surface mode to edit your Surface, you can export the Background, Skins or Image Stickers to your Photos, edit them in any painting or photography program you like, save them back to your Photos, and then reload them.
If you create an image with some other program to import, they can be of any size and any aspect ratio, and it will be stretched to fit. For best results, make a Surface or Skin image that is wider than it is tall, since it will wrap around the sculpture. Remember though, that since you can shape the sculpture very curvy, the image will get distorted.
Once you have made the graphics, you must name them with a two part file extension: like ". sticker.png" or ".skin.png". If you do not, Sage will not recognize them as Stickers or Skins, and will load them as Backgrounds. You can use "File Sharing" in iTunes to transfer the files to the app.
PNG is the preferred image format for decals, and is the only one where transparency will be accepted. Images can be in the following formats as well:
- tif
- jpg
- gif
- bmp
Exported Stickers will always be PNG.
